Tuesday, March 11, 2014

I Need A Chocolate Fix! Chocolate Raspberry Pudding

I have a crazy sweet tooth. Like, can't-think-about-anything-else, bring-me-chocolate kind of sweet tooth. Sometimes I chew sugarfree gum to soothe the palette but it doesn't always help. Eventually, like all cravings, it passes. I'll drink water, or unsweetened herbal teas. I wish I could tell you that I'm a super hero who battles this sugar demon within me with valor and bravery. But really, I'm not a super hero at all. I succumb to my cravings all the time. I hope this post will help you feel less guilty about your temptations. And, maybe you'll find a new way to sate your sugary desires.

This is a dessert I make myself when I have a mild case of the get-me-my-chocolate-fix-NOW syndrome. It's chocolate. It's pudding. It's amazing. But it's also good for you too. It's full of protein and fiber, antioxidants and probiotics, and all those other fancy words people look for in 'healthy' foods.
Yes, it's a lot of ingredients, but they're not all necessary.

The ingredients you need to make the most basic chocolate pudding are Greek yogurt, cacao powder, vanilla extract and some sort of sweetener (maple syrup, agave, sugar, honey, Stevia, Splenda, etc). I usually use agave or honey as I'm not a huge fan of maple syrup, and I hate the taste of artificial sweeteners. But if you prefer Stevia over honey, or sugar over maple syrup, then by all means. For the chocolate raspberry pudding, I simply added a handful of fresh raspberries to the mix!

In a bowl add the following ingredients:

Basic Chocolate Pudding
1 cup Greek yogurt 
1 TBS cacao powder
1 tsp vanilla extract 
1 TBS (or more to taste) sweetener of choice

Here we have a  cup of Greek yogurt, 1 TBS cacao powder, 1 tsp vanilla extract and some raspberries. Yum!
Want to jazz it up some? You can add different toppings, or change up the flavor combination. Mash a super-ripe banana up into your 'chocolate pudding' and you have a chocolate banana flavor. Or, add PB2 (or regular peanut butter), and you have a Reese's inspired chocolate peanut butter pudding. What about chocolate covered strawberries? Blend the Greek yogurt, vanilla extract, cacao powder, sweetener of your choice and a few strawberries in your blender.
One of my favorites! Greek Yogurt with Chocolate PB2 and agave. Topped with homemade granola, goji  berries and pepitas
I also love adding toppings like chia seeds, almonds slivers, cacao nibs, goji berries, granola and dried fruit. My favorite is making candied almonds on the stovetop. I use the candied topping on my salads too, instead of croutons. They're so versatile, they can rock a salad or a chocolate pudding. It takes fewer than five minutes and all you need are two ingredients: nuts and honey. Simply toast your almonds (or nut of choice) in a skillet. When they're just about done, turn off the heat, and drizzle a thin layer of honey all over. Spill out onto a plate and allow to cool and harden. Then break up the pieces over your salad or in this case, dessert.

But don't let me give you ideas. I'm sure if you love pickles with anything, they'll taste good on your yogurt! (I won't judge!) Same goes with anchovies and pepperoni. Have at it. I bet it'll still be more flavorful, better for you, and have fewer calories than the puddings you buy in the store (and they don't have amazing flavors like Chocolate Covered Anchovy Pickle!
Tell me what your favorite pudding flavors are. I'll be posting a vegan pudding for my next entree. It's a moussey puddingy deliciousness in a glass.

Til next time!
-Kale Queen


Thursday, February 20, 2014

I RAN A 5k!!!


So, remember back in October when I wrote this post about running a 5k? Roy and I ran The Color Run this past weekend. We trained since October, using a free phone app called C2K Free which is a couch to 5k program broken down into nine weeks of walk/runs. In December, we got off track because of our cruise and subsequent three-week-long winter plague. But we got back on the proverbial horse; first by going backwards and repeating weeks we'd already finished, and then continuing onto weeks we hadn't reached yet.

Our shiny new shirts, one day before the 5k!

Back in October, it was hard for me to run 30 seconds straight. On my birthday, October 18th, we got up at 8 a.m to run Week 3 Day 3: Brisk five-minute warmup walk, then do two repetitions of the following: Jog for 90 seconds; Walk for 90 seconds; Jog for 3 mins; Walk for 3 mins. I was nervous that morning. I'd never run quite that long before. But I did it. We did it. That night, when we went out with our friends to celebrate my birthday, I gushed that I ran three whole minutes straight. One of my friends looked at me oddly and said "that's not really a lot." And she was right. It's not like I ran a marathon. I ran three minutes. But it was a lot for me. It was a big deal. First of all, I got up to go running on my birthday. That's a big deal. Then, I ran non-stop for three minutes after struggling with running for thirty seconds two weeks before. Insert major high-five here.


After that, the weeks got progressively harder and easier at the same time. By week 4, I had to run for five minutes straight. Week 5 had a solid eight minute run. And by week 6, I broke the 20 minute mark. I couldn't believe it. I was doing it. Yes, sometimes I felt vomitous when we'd finish our run. But the nausea was quickly replaced with exhilaration. And the feeling of accomplishment. Awesomeness. Achievement... I was proud of myself.

Did I mention I was a smoker when I started? I didn't smoke a lot but I was a smoker. The little box you have to check off when you're at the doctor's office would have a sad little 'x' in it for 'smoker.' I used to smoke cloves. Sometimes, I'd only smoke two a day. Sometimes, I could go through half a pack (that's six, as the packs of cloves I bought only had twelve cigarillos.) Sometimes I wouldn't smoke at all for days or even weeks at a time and then start back up again. When I started running, I wanted to stop smoking. Maybe it's because smoking made it so hard to breathe, and I hated the feeling of suffocation while running. It's like drowning in air. I'm happy to say my last clove was around November 13th, and I only had one, and I haven't touched a clove since.

Other runners loved my shirt and cheered me on!
And, on February 15th, Roy and I got on our Color Run shirts, put on our temporary tattoos we were given in our Color Run packet, pinned our numbers on our fronts, and ran the 5k. All the way, non-stop, with paint in our hair and in our mouths. And we did it. I wrote on the back of my shirt that it was my first 5k, and I needed people to cheer for me to help me on. And they did. Other runners provided encouragement and cheers along the just-over-three-mile run. Roy's mom stood at the finish line, camera in hand to snap the finishing photos. I was over the moon.


For anyone who has never run before, and is not "a runner," I strongly recommend you try a couch to 5k program. There are lots of apps on your phones, or if you don't want to carry your phone with you, lots of programs you can read about to help you get up and start running. I didn't haul ass down the track at 40 miles per hour. I jogged at a snail's pace (almost going backwards) but I was moving. And no one can take that away from me. I did it. And you can too.

Til next time!

-Kale Queen


Crossing the finish line!!!

We were covered in paint


That's a seriously happy Gabby :)


Monday, January 13, 2014

Strawberry Kale Salad with Goat Cheese and Candied Almonds and Pepitas


I have a funny relationship with my salads. It's monogamous and loving at first. We see each other everyday. There are sparks flying. I feel all warm and fuzzy inside. We're completely committed to each other and are totally exclusive. And then, the relationship fizzles and I get bored. Suddenly sweet peppers are capturing my eye. Bean sprouts turn me on. And when once I wanted savory, I now want sweet. Viscous cycle I tell you. Viscous. I'm such a salad ho. 

I cheated on my last salad. We had a great thing going with the tahini lemon dressing. And then I saw strawberries at the grocery store and I... I became weak with desire. 

This salad love story is for real this time, I just know it. We were meant to be together. Strawberries with a honey lemon dressing. It's like strawberry lemonade! And candied pepitas and almonds instead of just plain old toasted ones. This salad is like dessert in a bowl. Oh and I forgot the crème de la crème. The ultimate icing on the cake. The angels singing all their glory. Yes. You know it. Crumbled goat cheese. 

You look hungry. Ok. Here's the recipe. It seems long but I broke everything down in tiny steps. You have to do this right. You must always work on your relationship. This one is the one. I feel it. Good luck! And may you live happily ever after together in salad heaven.

For the salad:
1 bunch curly kale
5 large strawberries 
1/4 cup crumbled goat cheese
1/2 lemon
extra virgin olive oil (enough to drizzle)
Pinch of salt


For the candied almonds and pepitas:
1/4 cup pepitas
1/4 cup sliced almonds 
Honey to drizzle 
1/2 tsp vanilla extract 


For the dressing:
1/2 lemon
1/4 cup olive oil 
1-2 TBS agave or honey
Black pepper 


1. In a medium sized skillet, add pepitas and almonds to toast.
2. Remove from heat when they've reach desired toastiness.
3. Immediately add the vanilla extract and drizzle honey all over the nuts. Stir it up with a wooden spoon.
4. Pour candied nuts onto plate and allow to cool and harden.
5. In the meantime, julienne your kale. (Watch my video for instructions)
6. Add juice from half a lemon, a drizzle of olive oil, and salt to the julienned kale.
7. Massage kale until you get desired consistency. (Watch my video for the fun(ny) and easy instructions
8. Slice up strawberries and add to the kale salad, along with the goat cheese. Set aside and begin making salad dressing.
9. Combine all ingredients for the salad dressing in a cup or bowl, and mix well. Pour over kale salad. 
10. Last step: add the candied almonds and pepitas to the salad and enjoy the tangy, sweet, and crunchy love fumes. 

Til next time! 

-Kale Queen


Friday, October 4, 2013

Crossing Off a Bucket List Item: Running a 5k!

I don't remember when it was that I decided I wanted to run a 5k. I hate running. I'm really not a fan of exercise in general, but I do it because it's good for my body and it tones my muscles, making me look and feel better. So it's quite a shock (believe me) for me to say that running a 5k is a bucket list item I'd like to check off.

I don't even have a written down bucket list. It's more of something that's in my head. And I can't even think of many items that would make the bucket list. But, nevertheless, running a 5k is on it for sure. Up until this point though, it was something I wanted to do, and imagined I'd do eventually. It's as though a 5k run would magically happen to me, like when my tooth fell out, or when my boobs became boobs.

I've been invited to run with people or as part of a group for a long time. Roy's boss does the Gate River Run and the Mud Run and has been asking us to join him for some time. I've been invited to join 5ks for Race for the Cure. But I always made excuses, the biggest one being "I haven't trained to run a 5k, so I can't." But then I wouldn't train! Ugh. Isn't that annoying?

On Facebook last week, I saw advertisements for The Color Run 5k coming up in February 2014, and I knew that was going to be my first 5k. Well, it may be my only 5k, but my bucket list doesn't say I'd like to run ALL THE 5Ks! It's just I want to run a full 5k without keeling over and dying slowly while other runners stampede over my lifeless body. Or just Run a 5k for short. So I finally did it: I started my 5k training with Roy this morning. I downloaded a free app on my iPhone called C25K Free and it's set up to give you a training regimen you follow three days a week for 9 weeks.

During the first week, you begin each training session by walking briskly for five minutes, followed by alternating between 60 seconds of jogging and 90 seconds of walking; eight reps each. Then there's a five minute cool-down, which totals 30 minutes. The second week's training begins with five minutes of brisk walking, followed by an increased jogging time of 90 seconds and an increased walking time of 2 minutes; six reps each and totaling 31 minutes. And so each week, the jogging time increases until your lungs and legs are ready to take you to the 3.1 miles, or 5k finish line.

I told Roy I'm hesitant to believe I can actually do this, because I was never able to run so much as a mile in gym class, even though we ran everyday for an entire semester (18 weeks). I have half the time now (9 weeks) to run three times the amount I did in gym class. (3+ miles). I don't know if I can do it. Currently, my state of mind is that my body is weird, and maybe my bone structure is off, and I'm simply not built to be a runner. But, I used to say my body could never be a size 2 because I have 'child bearing hips' and that turned out to be a lie. Once I got on the healthy food bandwagon, and shed 40 pounds, I also shed much of those so called 'child bearing hips'.

I never thought I could love vegetables as much as I do, and that I could drink black coffee and enjoy it. I never thought I could eat a salad without first drowning it in a pool of ranch dressing and I never thought I could go two full years without a Big Mac and not care. So, I'm going to use that same mentality and hope to one day say "I never thought I could run a 5k, and now I love running!" I wanna be that girl! I wanna be that person I used to think was crazy for running in short shorts in January, or at 7 o'clock in the morning on a Saturday. I wanna be able to go out and enjoy splurging on a nice Italian pasta dish, and not worry about it because I know I'll use up the fuel later. I wanna have sexy legs and thighs that don't itch immensely during runs. I want a butt that isn't deflated. I want that "euphoria" runners are always talking about. I want runner's high. I want to talk about how I beat my time from my last run. I want to change the things I want, and want what's actually good for me.

You could say I'm starting my New Year's Resolution early. I just don't want to wait until next year. I want it now. I want it yesterday. So I'm going for it today. I signed up for The Color Run this morning and I'm going to do this thing, even if it means I will end up walking half of the 5k. My goal is to run the entire thing the entire way. And damnit, I'm going to do it. If it won't be my first 5k, it'll be my second one, or my third. But I will do it.

If anyone has any tips for me, I'd love to hear it. Particularly what I can do about itchy thighs! What's up with that anyway? As if running wasn't hard enough, I feel like I have poison ivy halfway through. Oy.

Til next time!

-Kale Queen

Thursday, October 3, 2013

Experimentation: A Three Course Fully Squashy Meal

As the title suggests, I decided to cook up a huge meal consisting of some type of squash as the main ingredient for an appetizer, entree and dessert. The pictures are abhorrent, and again wine was involved, so please forgive me for taking photos of everything after half of it was already chewed up and digested. I really need to get better about that. We were all so merry and drinking wine that I completely forgot about taking photos for my blog post until after I'd already desecrated each entree. The reason for the jolliness was not just because the food was so amazing (even though it was). We were also celebrating Roy's sister Jennifer's birthday! I decided our family dinner night would be a great opportunity to cook a fully vegan dinner and to get feedback on the different recipes I was trying. And since Jennifer was born in the fall season, I thought it would be perfect to use fall seasonal produce.


The first step was to create a menu. I opted for a Thai Curry and Coconut Butternut Squash Soup, followed by Spaghetti Squash Spaghetti (or as you may now know it, my Lasagna Cake), and ending on a sweet note with Grain Free Pumpkin Bars with an icing you may remember from my By Accident Sugar Cookie Kale Chips Recipe. I'll explain...

For the butternut squash soup, I didn't follow the recipe entirely. The changes I made are as follows:

1. I didn't have kaffir lime leaves and had no idea where to buy them.
2. I used coconut oil instead of grapeseed oil.
3. I added a lot more than 1-2 tsp of the thai red curry paste because we all agreed the soup needed more kick
4. While I did roast the butternut squash, and sauteed the onion, ginger and garlic, once those items were done cooking, I threw all the ingredients into my Vitamix and blended for fifteen minutes at a pretty high variable (7-10). 
Blending the soup!
After 15 minutes of blending, the soup was piping hot, and I added what I felt was missing from the flavor; more thai curry paste, more salt, some fresh ginger, etc. I had everyone do a taste test until they all agreed the soup absolutely positively could not be better. I agreed. It was heaven. And the color is so gorgeous, like a setting golden sun. Ahh...

You may be able to see from the picture that I served the soup topped with roasted pepitas (pumpkin seeds) and cilantro. I highly recommend the cilantro. I found so many recipes of butternut squash soup, and everyone uses something different. You'll find everything from popcorn to pomegranate
seeds to almond slivers. But trust me on this one, add the chopped up cilantro.
Thai Curry and Coconut Butternut Squash Soup topped with pepitas and cilantro

Here's my recipe, adapted from eclecticcook.com (who adapted it from disneyfamily.com).

Thai Curry and Coconut Butternut Squash Soup
Adapted from eclecticcook.com

1 large butternut squash, about 2 pounds
1 tbsp oil, I used  coconut oil

¼ cup onion, minced
1 TBS freshly grated ginger
2 cloves garlic
1-2 TBS Thai Red Curry paste (+ or - depending on your heat preference)

4 cups chicken broth
14 oz coconut milk (I used Silk brand Coconut Milk)
1 tsp salt (I used Himalayan Sea Salt)
2 TBS freshly squeezed lime juice
Cilantro, chopped (for garnish. Optional but highly recommended)

Pepitas (for garnish)

Preheat over to 400°F. Cut the squash in half lengthwise and remove the seeds. Brush the cut sides of the squash with oil and place cut side down on a baking sheet or baking tin.  Roast for 45 minutes to 1 hour or until very tender. The squash should have a creamy texture. Once the squash has cooled enough to handle, scoop the flesh out of the peel using a spoon.
 

Sauté onion, garlic and ginger until lightly brown. 

Add scooped out butternut squash flesh into the blender, along with sauteed onion, garlic and ginger. Blend

Add in remaining ingredients (except for the pepitas and cilantro, as they are your garnish). Blend for fifteen minutes or so, checking on it every so often. Taste the soup, and add any additional spices as you see fit. 

Serve, top with pepitas and cilantro. Enjoy!

I won't go into details about the making of the spaghetti squash spaghetti, AKA my Lasagna Cake, because I've already covered it in my previous post. I will say, however, that everyone loved it. I witnessed family members going for seconds, so that's like, a big deal. Right? The spaghetti went really well with wine, so that's also a bonus. And a bigger bonus is, no one felt bloated or guilty. I didn't add the cheese this time, so it was even healthier than the original Lasagna Cake I made. I'll throw in a picture here, but the camera just wasn't doing it justice. I hope it still looks as delicious as it tasted!!!
Spaghetti Squash Spaghetti AKA Lasagna Cake
Moving onward to ... drumroll please... the dessert! Yes, it's the last item on the menu, and it's still vegan, it's still healthy, and it's made of squash! Cue the Grain Free Pumpkin Bars! Yay!!!

I only changed one item from the original recipe because I swapped the honey for agave syrup like I always do. Also, I didn't follow the suggested "icing" for the cake and instead opted to make my own. I even went the extra mile of making my own almond butter, instead of buying a can of it at the store. 

Making your own almond butter is super easy as long as you have the right tools (a powerful blender like the Vitamix) and you learn the tricks. I had to do some research and when I tried making almond butter the first time, I succeeded in five minutes.

All you need are almonds, but HEAT THEM UP FIRST! This is so important, and I'm sorry for shouting that out at you, but I wanted to make sure you were paying attention
. When the almonds are heated up, they release the oils quicker and easier (which means you won't have to add additional oil/liquid to get that buttery consistency!) Do not throw a bunch of almonds in your Vitamix two seconds after taking them out of the fridge (if that's where you keep them.) You can roast them for ten minutes, or do what I did, which is to toss them in the dehydrator for 20-30 minutes at 130°F. Once they're warmed up, toss the almonds into your Vitamix, start at Variable 1 and blend. In a minute or two, you'll move it up to Variable 3, and use your tamper to move the almonds around or push the crumbles down toward the blades. This process shouldn't take longer than 10 minutes, but I had a half a cup of almond butter made in five minutes. 

Once I had the almond butter made, I mixed it in with the pumpkin puree, agave, eggs, spices, baking soda and vanilla extract, and then baked the mixture. While it was baking, I set off to create my icing. If you've ever looked at my blog post about the Sugar Cookie Kale Chips, you'll find my icing inspiration right there! It's all vegan, and yummy yummy. 

The Kale Queen's Sugar Cookie Glaze

1/2 cup almond milk
1/2 cup cashews, soaked
5 medjool dates, soaked
1 TBS chia seeds
1 tsp vanilla extract
2 tsp coconut oil
1/2 tsp Himalayan pink sea salt.
1/2 TBS cinnamon

Blend all ingredients. Pour out on top of Grain Free Pumpkin Bars and serve.

The icing paired so well with the pumpkin bars. I'll probably use this icing recipe on muffins, pancakes, and any other healthy pastry I might make. It's sinfully sweet, minus the sin. Haha!
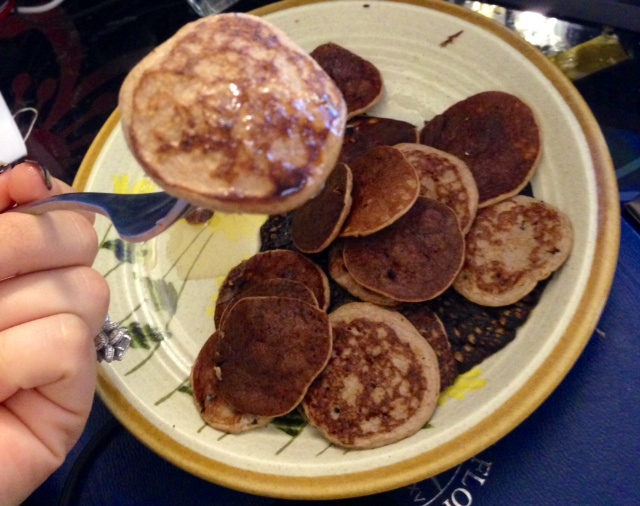
Oh yeah! I should take pictures of the pumpkin bars before it's all gobbled up!
So there you have it! A fully vegan, fully squashtastic meal that you don't have to feel guilty eating. I think it still surprises me that vegetables can be eaten as dessert and taste amazing. And yes, I categorize pumpkins (and tomatoes!) as vegetables, regardless of their scientific identity. It took me a long time before I considered healthy food anything other than cardboard bran. I hope that anyone who reads my blog realizes that it's possible to eat healthy AND yummy without sacrificing on either one. 

I hope you've enjoyed this menu, and again, I apologize for the photos. I will try to do better next time. Til then, maybe you can let me know your outcome with this menu! 

-Kale Queen

Wednesday, October 2, 2013

Autumnal Adventures! Lasagna Cake and other Creations

Happy fall everyone! It's officially here! The weather is getting cooler. Pumpkin Spice Lattes are back. (Hooray!) Magazines are displaying pictures of women in boots, and I've already seen three girls rocking out crochet hats. And of course, every store is filled with Halloween candy.

I'll admit, I used to not be a big fan of the fall. Even though my birthday is in October, and I love Halloween, and my boots, and PSLs, and jeans, I don't love the eerie looking squash and pumpkins that have started showing up at grocery stores and farmers' markets.

Well, I didn't love them. But my mission is to start! And I can already feel the sparks flying.

The main reason I didn't like these freakish gourds was because I had no idea what to do with them. Pumpkin pie can be made with canned pumpkin pie filling. But what's that goopy mess inside the pumpkin used for? And what about those seeds? And what about that hard shell of the spaghetti squash? Do you wash it? Do you cut it? Do you take a sledgehammer to the rind? (I contemplated that before I simply asked Roy to use his manly power to cut all of them open for me.)

Anyway, everyone has to start somewhere. I used to not know how to cook anything. (Well, unless you count adding water to the fill-line of the microwavable mac n cheese containers...) So I thought, surely I can figure out how to master the butternut squash, the pumpkin, the spaghetti squash, and all those other weird bumpy circular heavy things invading the grocery aisles.

I started with the spaghetti squash and have made two different meal varieties following recipes I found on Pinterest. The first was a Spaghetti Squash Au Gratin with Caramelized Onions I thought would be like mac n cheese. I'll say it's less like mac and more like cheesy hash. Nevertheless, the recipe ROCKED. I took it to a family dinner and it was quickly gobbled down, so it's a winner.

I had to take a bite... then realized I had to take a picture!

The second time I tried spaghetti squash, I followed most of the recipe from the aforementioned Au Gratin recipe, but instead of adding cheese and Greek Yogurt, I topped the spaghetti squash with some Bertolli spaghetti sauce and chopped up some leftover chicken sausages we had from a pool party the night before. Then I baked this "casserole" for half an hour at 375° and topped it with some mozzarella cheese. Roy loved it, and said he still couldn't come to terms he was eating a new vegetable that he liked. Roy's almost 15-year-old picky-eater teenaged son, David, gobbled down half of the entire tray that I made. He even came up with a name for it: Lasagna Cake. I'll take it. (Note: I didn't tell David he was eating spaghetti squash instead of actual pasta. Some things are better left unsaid...)

So here is the recipe for...

Lasagna Cake

1 medium spaghetti squash

1 medium onion, diced

2 TBSbutter


2 cloves garlic, minced


1/2 tsp salt (+/- to taste)

1/2 tsp black pepper


1 cup your favorite spaghetti sauce (homemade or store bought)
1/2 cup mozzarella cheese
1 TBS olive oil 
2 tsp oregano
2 tsp thyme


Preheat oven to 375°

Cut squash lengthwise. Scrape out the seeds. Salt the flesh of the squash and wipe some olive oil on it. Grab baking dish and add enough water to cover the bottom of the dish. Place spaghetti squash face-down. Bake for 45 minutes. 
While squash is baking, caramelize onions and garlic with butter. Add salt and black pepper. Remove from heat once onions are light brown. Remove from heat and set aside.
Once squash is done baking, remove from oven and let cool down a few minutes so you can handle it while scraping the flesh. Add spaghetti squash 'noodles' to an oven-safe casserole dish. Spread out caramelized onions and garlic on top. Add tomato sauce and cheese and mix up to spread sauce evenly. Top with oregano and thyme. 
Put Lasagna Cake back into the oven for 30 minutes. After that, remove from oven, let cool slightly, and enjoy!
Lasagna Cake!
As for those weird seeds you'll find in all sorts of squashes, you can do what I did with them. First, remove all the weird stringy madness from around the seeds. This may be a little bit time consuming, because the seeds are super slippery, but work through it to get all the seeds untangled, and then wash them. Pat them dry with a paper towel, and then put the seeds in a baking tin and spray with oil. I used truffle oil. We have one of those spritzy sprayers that provide a more uniformed coating of oil. (I use it when I make popcorn too!) You can find them anywhere, and I bought ours for 10 bucks at TJ Maxx. If you don't have a sprayer, just coat the seeds anyway you can in the oil of your choice, and then salt them before popping the baking tin in the oven for 15 minutes at 400°. If you're like me and you like really toasted brown seeds, leave them in for longer, but first shuffle the seeds around so they're not just toasting on one side. Once they're done, enjoy! I eat the seed whole, without taking off the shell. I don't think there are any problems with that, but you do as you wish. 

My goal is to go on Pinterest and find more recipes that are autumnal. One such recipe is the
Turkey, Wild Rice, Apple, and Cranberry Stuffed Pumpkins but I might skip out on the wild rice and just use turkey, apples and cranberries. Maybe I'll substitute spaghetti squash for the rice! I haven't yet decided but it's on my autumn food bucket list!

What autumn veggies have you used so far? Lemme know about it!

Til next time

-Kale Queen

Wednesday, July 17, 2013

Banana Nut Pancakes


You know how it's called comfort food because it's meant to be comforting and yummy and feel-good? Well you also know comfort food is a big no no when you're trying to stay healthy and keep your bikini from being your worst nightmare. I am always trying to find ways to make compromises so I can keep my bikini body AND my insatiable appetite in sync. So, here is another recipe that is guaranteed to make you happy (so long as you like bananas.)

A friend of mine recently posted a recipe on Facebook about having made pancakes using only two ingredients: one banana and two eggs. (Hey Alice!) Naturally, I was slightly skeptical and also very intrigued, so I had to make them. 

Roy's birthday was this past Sunday, and since we have his kids with us this summer, I thought it'd be nice to treat them all to some yummy cinnamon roll pancakes; a recipe I found on Pinterest. (When I told Roy about them, he said: "They're not just sin. They're the express train to hell pancakes.") Now, that recipe is absolutely deliciously disastrous for your waist as well as most of your internal organs, but hey, you gotta live a little. I informed the kids that had they known me during "Flabby Gabby Days," we'd all be well on our way into daily diabetic shocks. But since Flabby Gabby turned into Skinny Minnie, thankfully that won't be happening. Once in awhile however, I allow them all to indulge, and I thought Roy's birthday would be the perfect opportunity. I won't be going into the cinnamon roll pancakes, but I will post a lovely photo of them and all their cinnamony glory. Yummo.

Roy's Birthday Cinnamon Roll Pancakes
For myself though, I thought it'd be a great opportunity to try out those banana pancakes Alice posted. It was simple enough. I threw a super ripe banana into the Vitamix along with two eggs, blended, and poured the batter into the skillet. I'll say it was a bit of a nightmare to flip the banana pancakes, but I managed to do it, and we all nommed on our breakfast happily. While I ate, I imagined all the ways I could improve the two-ingredient recipe, and this morning I tested out my plan.

I blended a banana and two eggs, and then added some cinnamon and nutmeg to the blender. Once it was blended, I added about a quarter of a cup of raw walnuts, and pulsed a few times to chop up the walnuts but not puree. Then, remembering the difficulty I had flipping the pancakes on Sunday, I made small silver-dollar-sized pancakes. They sizzled and bubbled, and flipped relatively easily with my spatula. The smell was amazing, and it smelled like a fresh baked banana nut loaf coming out of the oven. Mmmm mmmmm. I used a little bit of agave as my maple syrup stand-in because I didn't have any maple syrup (we didn't buy any for the cinnamon roll pancakes because they didn't require any since they're topped with a cream cheese icing). The result was amazeballs. Truly, amazingly delicious. And zero guilt. AND zero bloat! I ate a plateful of these delicious pancakes and didn't feel like I needed a nap afterward. And no, it didn't taste like a banana omelet. The egg and banana mixture make that fluffy consistency you get with regular flour pancakes, and neither flavor overpowers the other. The ratio of one banana to two eggs is perfect. I do wish they wouldn't fall apart quite so easily, but that's why I recommend making smaller pancakes. Plus, they look so cute and it's the perfect bite-size pancake.

Perfect silver-dollar-sized pancakes
I hope you enjoy these as much as I did. Kudos to Alice for posting on her Facebook wall about these. I'd otherwise have never found out about them! Let me know if you think of some other flavor enhancers for these bad boys. I am definitely going to be playing around with a blueberry pancake idea shortly. I'll keep you posted!

Til next time!

-Kale Queen